Friday, December 10, 2010

Cute Onesie Tutu

I mentioned back in October that I had made a cute onesie tutu for a friend's baby. Thought I'd actually show you a picture. (It's only December, I'm not that late, right?)  Here are the materials. Nothing fancy. Cute onesie. Some ribbon and tulle (and pink thread, not shown).
It was a quick sewing job. My tulle was very short (perfect for a onesie), so I didn't need to trim it at all, just fold it in half. I positioned the tulle so that it would not touch the baby's legs and bother her. I then sewed the folded tulle on; wrapping it twice, so that it is four layers. With that complete, I sewed the ribbon over the top of the tulle; and voila! Done.
Of course, before giving our gift, we had to try it on (so insisted my 3 year old). So, who better to model than her pink Sea Otter?
I know. Too cute.

Princess Tea Party

In honor of my just-turned four year old's birthday, I thought I'd share last year's birthday party. For her third birthday it was all about being big enough to have a real tea set and pretty, fancy things. In order to accomplish this, but not break the budget, we had to get creative. Something I love to do! First, I hit the second hand stores and scored a cup and saucer (matching no less) for each child at a cost of 98 cents a child. (We had 5 children, including the birthday girl and her sister--We keep it small around here)

After getting the cups home, I washed them, and grabbed the acrylic craft paint and proceeded to paint each child's name on one cup. Party favor one.

Next line of business was to sew cute gift bags that double as a dress up purse. For this, I made a trip to Walmart's sewing section and scored some hot pink, fuzzy fleece and pink polka dot ribbon (all on clearance/remnants). These were very simple bags that I lined with some fabric that I 'inherited' from old curtains in a former house. See, I knew I'd use it one day. ;)


Party favor two. Check. Oh, and to fill these bags, I managed to find a necklace, bracelet and ring candy kit at my local dollar store, plus a few lollipops I had in my stash and some dollar store trinkets. All in all, the bags (materials and filling) cost about $3 per child. So we're up to up $4 a child.

Next step was to decorate for the party. This involved streamers and pink tulle. The latter that I bought off of ebay for a steal! I also needed the cheapest pink bouquet of flowers (with at least 5 sprigs each) and balloons. For the balloons, I again shopped the local dollar store and got four white heart balloons and four pink heart balloons, and two 'special' balloons. Mylar. One dollar each. Also found lovely pink mums for $5 a bunch. Plenty for all.  Here's how things were looking.


For the cake, my princess had a Cinderella cake. I purchased a Cinderella water Barbie doll and then baked a cake in one of my mixing bowls. I then inserted the Barbie (after wrapping her in plastic wrap) in the cake and decorated.


The plate is something I made another time. It's the "Birthday Plate" in our house.

When it was time for our guests to leave they took home a cute, fuzzy bag with goodies, a balloon, foam picture frame that they made while here, a personalized tea cup, and a mini bouquet of flowers. So, for our cost tally, we have the $3 bags, $1 tea cup, $1 balloon, $1 flower bouquet and about 50 cents for the foam craft. So, we spent less than $7 a child for a whole lot of cool stuff. That is $35 plus another $5 for the other balloons that the birthday girl kept; about $5 for the tulle and streamers. I made the cake, so only a couple of dollars in materials there, plus the Barbie, which doubled as a gift (about $10).

Birthday total: $45 Let's call it $50, since I may have forgotten something. So, there you have it. A fun and really cute Princess Birthday party for my then 3 year old. A good investment for the money. At this age I would rather pay this, than rent a facility to play at for $100-$200 PLUS have to have goodie bags, cake, etc.


Thursday, November 4, 2010

Chalkboard mats

I am finally getting around to updating my blog. I've been healing up my back, potty training the kitty, and making some cute chalkboard mats. I saw one briefly as I walked past it at a craft show, and thought 'I can make that'. Unfortunately, I did not take the time to look it over and get the details, but I've made my own version. I hear tell these are hot right now. So glad I'm a trend-setter ;).


 As you can see, I have taken regular fabric (in this case Spiderman) and paired it with chalkboard fabric. I was able to find the chalkboard fabric at Joann's . When I searched for this fabric, first no one seemed to know what it was and second, it seemed a bit pricey to me, but I was able to get it here for about $4 a yard and free shipping. I bought several yards and I'm on to my 8th mat already!

If you want to make one, they are super easy. In order to maximize the CB fabric, I cut the pieces out 14 1/4" x 18" (which gives me two pieces along the width of the CB fabric, with no waste). I then take the exterior fabric and make that approximately 16"x 20". Next, lay the wrong sides together (regular fabric face down and CB fabric face up), then fold over the edge of the regular fabric to meet the CB fabric, and then once again to overlap it. Pin it this way along all four sides. For the corners, I fold the fabric over, bend the corners diagonally, and then fold over on to the CB fabric. The corners are now mitered. Sew a straight stitch along all four sides.

Now pick a tie. I have used ribbon and binding. If you use binding, sew along the 'open' side first. I do this with a decorative stitch to make it look a bit nicer. You'll need about 20-24" in length. Fold it in half and then find the middle of one of the short sides. Attach the tie onto the outer, fabric side (not CB side).  You are now finished! Now, I like to also add in chalk pockets (The last of the above photos shows a couple of the chalk pockets.) and a piece of cloth (I use Velcro to attach this) to wipe the board off with as well, but you don't have to do this. I found boxes of skinny chalk (6 colors, 2 of each) at Wal-mart for $1, so I bought a couple of these and a couple boxes of white. I like to include four pieces of chalk, and this makes a fairly inexpensive gift.

Hmm, speaking of the price, let's see, I get about 4 pieces of CB mat per yard, so that's $1 for the mat. All of my fabric is clearance, and I probably get 2 pieces out of it, so let's say about $1.50 (probably less) for that. I already had all the binding and thread, but let's throw in 50 cents for that. And, finally, 33 cents for the chalk, since I split the box in thirds. So, overall, we're looking at about $3.50 +/- a little; and my time of course, but I still would have spent the time to shop and wrap if I would have bought it. These really are fun gifts. My girls each have one (the prototypes, so their's aren't so fancy) and we use them all the time. One of our favorite games with them is hangman.  (Prototype below--no pockets or fancy sewing on the binding)

Happy sewing!

Friday, October 15, 2010

More soon...

Oops, several weeks have gone by and I haven't posted. I've been busy doing things like getting a new kitten, tearing a muscle in my back, ya know nothing major. So, just to let you know I will be posting something soon. I just made some really cute, and quick, chalk board mats that the girls can roll up and take with them every where we go (I don't have to bend over to make these). Also a cute onesie tutu. Pictures and commentary coming soon!

Thursday, September 23, 2010

Canning

This summer was my first ever attempt at canning food. It was very simple, though time consuming. I LOVE having food in my pantry 'made' by me though! My first attempts were to can tomatoes and strawberry jam; and then I tried my hand at pickles. (Which I actually can't stand, but we'll discuss later...)

To can food you need a very large pot, canning jars, and a jar lifter. I think you can make do with these things if you don't want to go buy anything (except that jar lifter), however I did stop over at Walmart and pick up an 'official' canning set. This consisted of the large pot with a rack and lid, jar lifter, magnetic lid lifter, and funnel. These items were in the $30 range, so pretty reasonable, especially considering this is something that I plan on doing a lot of. In fact that 20 lb box of Starkrimson pears I received last week are calling to me from the basement.

 
These two photos show you a little of the set up. I've got the really huge pot, which is the canner. The medium pot I am using to sterilize and keep warm my jars, and then the small pot is to put the lids in. You want to do this for just about 5 minutes before you need them in order to make the gasket flexible for a good seal. If you don't want to mess with having your jars in the boiling water for sterilization, you can use your dishwasher. 

I'm just going to send you right over to Pick Your Own, they have a great description of how to can. Very simple! If you don't have your own tomato garden, run down to your local farmer's market or coop and pick some up. You'll just need some lemon juice and you are set.

Here's my strawberry jam. Really yummy! And I used very little sugar. Just the minimum to successfully can.
 
If you don't think you're up for canning, give freezer jam a try. Just as easy as the jam I made, but you will put it right into the freezer instead of going through the canning process. Makes great gifts!

Wednesday, September 22, 2010

Cinnamon Bread

I fully intended to write Saturday, and even another day after, but I've had several episodes of internet outages that prevented this. So, tonight, I finally have a chance and I thought I'd share my recipe for Cinnamon Bread.
 
As you can see from this photo, my recipe will make two loaves. Which, if your family is anything like mine, is a good thing. They will devour an entire loaf in one afternoon. This bread also makes fantastic french toast.


 5-6 cups bread flour (you can use All Purpose if that's what you have)
1 package of active dry yeast or 2 1/2 teaspoons of yeast
2 1/4 cups milk (you can use coconut milk if you have a milk allergy)
2 Tbs sugar 
3 Tbs butter or coconut oil
1 tsp sea salt

Heat up the milk until it is warm (about 110 degrees). Do not boil it. If it's too hot, you'll kill the yeast. Once it's warm, add in your butter or coconut oil and stir until melted. Add salt and sugar; stir. Add yeast and stir until dissolved. Pour the liquid into a bowl that already contains 5 cups of your flour. Mix well. You can use a mixer, like my KitchenAid, or just mix by hand. It should be pretty sticky. Add more flour, about a 1/4 cup at a time until it's starting to pull away from the sides of the bowl and not so sticky. Pour dough out onto a floured counter and knead in more flour to make a smooth, elastic ball. Then take the dough and place it into a greased bowl. Spray waxed paper or plastic wrap with non-stick spray, place over your bowl and then place a towel on top of this. Set in a warm spot and let double in size (about an hour).

When doubled, punch down. Divide in half. "Roll" out each half (I just use my hands to shape it, but you can use a rolling pin if you'd like) into a rectangle. You want it to be as wide as your loaf pan is long. Once rolled out, brush on melted butter (or coconut oil) over the entire thing. Next, sprinkle liberally a mixture of raw sugar (you can use regular if you don't have raw) and cinnamon. I don't actually measure this, but I would say about 1 cup of sugar to 1 Tbs of cinnamon. Next you'll need to roll up the bread; start on a short side. Place it in a greased loaf pan with the seam side down. Repeat for the second loaf. Cover the pans just as you did with the bowl and let double in size (about 30 mins). Bake at 350 degrees F, for about 40 minutes. Enjoy! We don't even add butter on top it's so yummy!

Friday, September 17, 2010

Bountiful garden

Oh my! It's been two weeks since I posted an update on how things are at our house. Mostly I haven't posted because we were off traipsing around Washington state, enjoying the gorgeous scenery and raw milk they, (legally), have to offer! Oohh, what fun! This photo is what my parents get to look at every day out their windows. It's a gorgeous view of Mt. Baker. Tough, isn't it?


So, while I was gone, I was thinking about food. Hmm, now that I think about it, I'm always thinking about food. Anyway, the pacific northwest, well, and California too, have some great food opportunities. I really love it that raw milk is legal there. (I know I already mentioned it). There are several coops are in town and everybody shops there! It's awesome. One of the things we did while visiting was to attend a farm-hop. We 'hopped' around to several local farms to visit their orchards, cutting flowers, and beloved animals (both meat and dairy). Lots of fun and a beautiful day. By the way, and for the record, I have never seen roosters on a leash... So, when I came home I was excited to see what my garden had to offer after almost two weeks away. (Thanks, honey, for cutting off the sunflower seed heads. Can't wait to try the seeds!) And here it is: A couple gigantic cucumbers, squash, tomatoes,  chili peppers, a handful of raspberries (which my 3 year old promptly ate), and our 'accidental' potatoes, which I instructed said 3 year old to dig up.

Not bad for two weeks. Our first attempt at a large garden has gone really well, in spite of all the rain we've had this year. Rainiest on record I believe. In my quest to eat all that we grow, I cooked up the teensy potatoes for dinner this evening, along with some homemade, raw butter and sea salt, which accompanied the chicken I cooked (straight from the pastures of Iowa to my freezer). Mmm, fresh cantaloupe too. Then, only after the kids were in bed, I had the last scoop of (homemade, yes, I know) chocolate ice cream and a scoop of peanut butter ice cream (yeah, homemade too), with some chocolate sauce (no, I didn't make that, but I'd be willing to try). Shhh. Don't tell the girls.

I'm thinking tomorrow I should make some salsa and can it. I've got 20 lbs of pears to can as well. I think I'm going to be busy this weekend. Tomorrow I shall do my best to discuss my pickle experience, or maybe cinnamon bread. Or, I suppose I could share my ice cream recipes. Geez, see what happens when I go away? :)

Saturday, August 28, 2010

Prettying up my blog

This afternoon and evening has been spent trying to 'pretty' up my blog. I must say, this requires a lot of time and patience. Wasn't someone just saying something about being lazy? Oh, nevermind, I forget who that was. Anyway, pardon the weird look it may have for a bit. I've actually been trying NOT to spend an inordinate amount of time on the computer today. It's SUCH a lovely day here in Iowa! The kids and I flew kites, threw a frisbee, played in the water, and then I left them to water color paint my hosta leaves (after they'd trimmed them off), while I tried to wrestle with blog stuff and not burn dinner in the process. Dinner was successful. I'm still wrestling, and I'm about 3 minutes past when I told the girls they had to come in and get clean. Since I happen to notice at dinner that the hosta leaves weren't the only thing that got painted. Ahem. So, I'd better get to it!

La, la, la, la, la. Speed ahead about two hours now. My dishes are still dirty, as is much of the house, but the kids are in bed, or in their rooms really is a better description, and I'm magically back!  Thought you'd enjoy a photo of what 'painting plant leaves' looks like. 
 
Really rather cool looking and creative, if I do say so myself. After I sent those two off to the shower, I had to head outside and scrub off my front walk. I really despise water color paints. They are so difficult to get off everything! I banished them from the house after someone got paint on the shades, floor, chairs, and of course the table, but that goes without saying really. 

This reminds me of my 3 year old. Last summer, when she was two, I was mowing the grass in the back yard. My husband was 'watching' her (I feel everyone nodding their heads now). He sent her out onto our back deck to water color paint a coloring book. At some point during this adventure, I looked ahead at the row I was cutting to see my daughter sitting on the bottom stair watching me. I looked at her and had to stop mowing. You see, I was laughing so hard it would have been dangerous to continue. Luckily she was only wearing undies, because she was ENTIRELY covered in dark blue paint! Wow, how could I be mad? It was too funny and I didn't have to clean it up. Well, back to the present. I did manage to get most of the paint off, or lightened to the point of it not being too noticeable on my walk way. Sigh.

Friday, August 27, 2010

Sandwich wraps

For some reason I just could not sleep this morning. I hate it when that happens, but it does have some positives. I do enjoy the quiet mornings when my house is still and I can do whatever I want. Like type without a little person interrupting every other word (literally). And this morning I have a cake order, which, since I resigned from my 'steady' cake job way back in December, have been few and far between. I have to say, I rather it like this way. I almost forgot what it was like to plan it all out. And the house smells wonderfully of cake. I will have to post a picture when I am done. This morning it is a cupcake 'cake' that will look like a large purple and teal flower. Fall usually finds a resurgence in cakes, with a quiet time around the Christmas holidays, then to pick back up in the spring before virtual silence in the summer months. Do kids with summer birthdays not eat cake? I don't know, my birthday is in the winter, as are my children's and most of my friends. My husband's is in the summer, but he doesn't really like cake...Maybe it's ice cream cake they eat?

Well, anyway, I am completely off the topic I intended to write about. Today I wanted to share this cool project I saw at  Chico & Jo . It's a sandwich wrap. I know, that's what plastic baggies and ziplocks are for. The problem for me, is with two kids, I use SO many baggies! It's crazy, and the girls are always grabbing some to put their 'treasures' in and carry around for five minutes, before I step on them and then put them in our play room to be forgotten. Well, that is, until a year later, when they've long since been tossed or reassimilated and suddenly they want to know where did I put those?? How could I have gotten rid of them? This is when I pretend I have NO idea what they are talking about; or blame it on their Dad, they usually believe that one.

So, yes, sandwich wraps, super easy. You know all of those plastic bags you get from the store? I tend to save them for trash bags or padding in packages, because in Iowa (or at least in my city) you can't recycle these in the curbside recycling program. Instead you have to go back to the store and recycle them. I think I mentioned in a previous post, or two, that I'm kinda lazy. Please. Don't make me go to the store for bottle returns AND plastic bags. It's just not happening. So, yes, I have quite a few bags, though now that I make my own shopping bags, I've found there are times that I have to purposely take a plastic bag because I need one for a project. This particular project requires 3 or 4 plastic bags, 1 one-gallon Ziplock bag, parchment paper (please don't use waxed paper, it will melt), some fabric (14x14"), thread, SEW on velcro (don't EVEN try to use the self adhesive kind--I've heard, though I can't say where, that this is a complete disaster and that you end up having to remove your sewing machine needle to clean it. Not to mention the multiple thread ripping, fabric jamming episodes you incur...Sigh. SO glad that didn't happen to me, wink, wink...) Did I mention lazy already?


Once you have all the proper supplies, place a piece of parchment on your ironing board, or in my case my granite counter top. Perfect for the lazy person, because I don't have to go get and set up the ironing board. Bonus! Now take your plastic bags, cut off the handles and all wording on the bags. Make a nice pile of 3 to 4 bags this way. Next, if you'd like to put words on your wrap, this is the time. Cut out letters from the leftover bag pieces and write something! I'll show you mine in case you're saying, huh?  (As you can see, I spelled the word "AUDREY" and  "REUSE" on the plastic)
When you place your letters, be sure to put them in the middle. As you heat up these bags (not yet!), they will shrink a bit, and you will be trimming the edges. Now, take your ziplock, cut it to fit, I just remove the zipper top and open an edge and then flatten it, and place on top of your bag and letter pile. Lastly, place a second sheet of parchment over the top of all of this. Okay, now you can iron. I go for medium high heat, you'll have to see how your iron handles it. Your goal here is to melt the plastic together to form one thick piece. You may want to open the windows while doing this. I haven't noticed major fumes, but I imagine there are some. Once you have this done you need to trim your plastic to a 12x12" square.
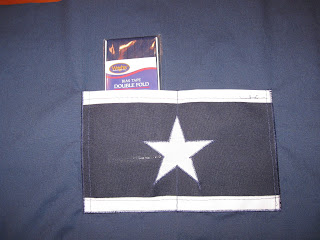
Now, place your plastic square face up on top of your larger (14x14") fabric square, (fabric is laying wrong side up--so wrong sides together). You now can do a double fold of the fabric at the edges. So, fold the fabric once so that it meets the plastic edge and then fold that part over so that it is now on top of your plastic. Pin. Do this all the way around. (you don't have to try to skip the pinning part...I already tried for you. It doesn't work). You are ready to sew the edges. When this is done you just have the velcro to attach. Cut two strips EACH of the hook and loop. Make them about 1 inch in length.  Lay your wrap down, plastic side up, in the diamond position (point up toward north, not flat side). Take a piece of velcro, let's say the hook one. Turn it lengthwise and pin it to the 12 o'clock position (at the point). Next take your other hook tab, turn it the opposite direction (horizontal) and pin it at the 3 o'clock point position. Flip your wrap over. Take your loop pieces. Pin one on the fabric side at 3 o'clock (horizontally again), and then pin the other one, lengthwise, at the 6 o'clock point position. So, two tabs on each side; one at each of the points (loops on same side, and hooks on same side). You want the 12 & 6 o'clock tabs to hook together and the two 3 o'clock tabs to hook together when you're all done, making, uh, a wrap. Okay, let's see a couple more pictures!

 
Oh, and one more thing. You may have noticed that my wrap doesn't look exactly square. Let me assure you that if you follow the directions, yours will be. Something about being lazy...oh, well, ya know I didn't quite measure it exactly as written, and guess what? If you don't start with a square, you won't end with one either. One of those little known math facts I'd ceased to remember in my haste.

So now you're set! Go make a wrap. And if you're so inclined, make a bag for all of those animal crackers. Which, I think for my next bag, I'll either extend the velcro strip, or I'll add a piece to the corners, as well as the middle.

Tuesday, August 24, 2010

Life is short

I have some fun projects to chat about, but honestly, the last couple of days I have spent thinking about how short life can be. Sunday evening my husband's Uncle was killed in a motorcycle crash. His Aunt is in the hospital still. I hope she will be alright. I think about this relatively young person (just 55), and all the things he had left to do in his life. His only grandchild just 4 years old, with a sibling on the way that he'll never meet. His wife of  33 years, now left to forge ahead by herself. Just in this last week or 10 days, there have been 8 other high profile deaths on our interstates. It's hard to imagine how life goes on. Having recently lost my cat and best buddy of 15 years, it's so hard to imagine the magnitude of pain I will feel when my parents, or heaven forbid husband or children die before me. Thinking of it now brings tears to my eyes. So, I hope everyone is sure to give their families an extra hug and kiss and remember to say 'I love you'. A small, but simple thing will make a world of difference. And please remember not to drink and drive. The above mentioned uncle's life was cut short due to the carelessness of a woman that chose to drink and then get in her car.

Saturday, August 21, 2010

Fabric bags

This week I've been working on a new bag for my super nice neighbor. Since my original dabbling into plush, fuzzy, girly gift bags for my newly minted 3 yr old last winter, I've started making more. I was determined to create something nicer than my first attempts, well, something more sophisticated perhaps. This is the very first 'real' bag that I made. Pretty good really, but when I look closely there is lots of room for improvement.
Since this bag, I've made several others. Mostly as gift bags for my kid's friend's birthdays. I decided though, that this latest one would be more thoughtful. Things like smoother seams, quilting, and better alignment. It came out really well, though, I admit it looks pretty similar to the first. However, my trained eye can tell the difference.....wink, wink
My neighbor really likes Americana, so I was looking for fabrics that would fit the bill. Unbelievably, I walked into the fabric section of Wal-mart and found 5 yards of this fabric for $5! Perfect. So, I took this home and proceeded to rummage through my fabric stash to find navy liner fabric.The photo below shows the outside of the bag, the liner, thread, edging, and fabric for an interior pocket.

 
Here is a look at the pocket after I sewed it to the lining:

 
All in all a successful project with very little work for my seam ripper. Now I just hope my neighbor likes it.

Wednesday, August 18, 2010

Crayon Roll

Yesterday crept up on me. I knew I'd be seeing a friend and that her middle child just turned 3. I had been wanting to make him a superhero cape, but time got away from me. I just didn't find time to run out and buy two yards of boy fabric. Now, don't get me wrong, I have LOTS of fabric, but I have two girls. Boyish patterns are hard to come by in our house.  I did, however, make a quick crayon roll. It turned out pretty well, despite my problem of not reading directions. It's a really bad habit, what can I say. It reminds me of the time my Mom let me make an Angel Food cake all by myself. I must have been about 10. Did you know that you're supposed to separate the whites from the yolks in an Angel Food cake? Yeah, I didn't know that; and I didn't find out until after I baked the cake, because, yep, I didn't read the directions, just the ingredient list.

Well, anyway, I realized AFTER I had embroidered said child's initial on the roll that I should have sewed the crayon part on first. Hmmmm. Took me a few minutes to figure out a good solution, because if you've ever embroidered something, it just isn't going to work to take it out. Even if you manage to take all of the stitches out, your fabric will look terrible. Now that I've done this once though, I think I got it. I even stole away for a few minutes last night to drool over all of the offerings at JoAnn Fabrics. I picked up some cool ric-rac and strapping for my next project. For now, here's the first attempt.

I'll have to post the superhero cape I made last week (which the crayon roll used the left over fabric from). It turned out well. I did actually read the directions for this one. I think I'm more cheap than lazy. I didn't want to waste the money I'd spent on two yards of fabric just because I didn't read the directions. Though, I guess I did have one mishap with the cape. Well, that's a story for tomorrow.

Monday, August 16, 2010

Fresh from the garden

So yesterday I mentioned that I am thankful for many things. One of those being my garden. This is the first year that I have had a real, honest to goodness garden. All of my gardening years have previously focused on flowers and the odd tomato, pepper, and asparagus plants. This year we saved up to put in a 30'x14' retaining wall behind our garage and put in our garden. The kids and I were super excited to get it planted and then we had to wait. We planted corn, tomatoes, peppers, carrots, spinach, sweet potatoes, sunflowers, strawberries, sugar snap peas, yellow squash, cucumbers, pumpkins, and watermelon. It's been overly rainy this year, so the tomatoes haven't been so good, nor the corn, but we are managing to get a modest harvest. What fun the girls have had searching for the peas and squash hiding among the vines!
I've been really happy with what we've grown so far. It's a great feeling to know that we can feed ourselves. I'm already drooling over seed catalogs for next season. I can't wait to try some new plants and rearrange the garden, now that I know how the sun hits each spot and for how long. We're looking forward to the strawberries producing too, as well as the new blueberry and raspberry bushes we planted this spring. Each day brings something new.

Sunday, August 15, 2010

Time Marches On

As mentioned in my post a few hours ago, it's been awhile since I posted anything. Almost 7 whole months! Whoa! In that time lots has happened. Here in central Iowa, we ice picked our way out of one of the snowiest winters on record. Marched through an average spring and have now endured the rainiest summer on record. If you're a Midwesterner, or especially an Iowan, you're likely keeping track. This summer has been worse than 1993. That's bad.

We're lucky where I live though. It happens to be on a hill. We've weathered the storms without incident, but others have not been so lucky. I think tomorrow, I'll share how lucky I have been. Till then..

Do Over

Well, gee, here it is August 15th, 2010. What, has it been about 6 months since I created this blog and actually posted something? Mmm, yes. Okay, let's have a do over. I'll try to post if you try to read. I have lots to post, really. It just seems that at the end of the day, I have no time left. I try to squeeze in some craft time for me, but alas, it doesn't always work this way. So, I'll catch you tomorrow, or maybe even later in the evening. Stay tuned...

Tuesday, January 19, 2010

What IS hoarfrost?

I've had lots of folks ask what hoarfrost is, so here's the definition: "A deposit of needle-like ice crystals formed on the ground (and objects) by direct condensation at temperatures below freezing point. Also called white frost." Hoar derives from Hoary (both Old English words), meaning grey or white, as if from age; ancient. Hoarfrost is a common earthscience term for this type of freeze. Here are some close ups of the frost. Very pretty and quite interesting.


The Beauty of Freezing Fog

For the last several days it has been extremely foggy here in Iowa. As I get up each morning at 5a to workout, I drive through the outskirts of town, and then into town, and watch as the scenery changes. We have had several days with hoar frost, and the trees are just beautiful.


This is a tiny Japanese Maple that is in my front yard. Today the girls and I will just enjoy a day of being at home. Perhaps I'll clean the kitchen, which I did not do yesterday. We made a trip to Pella, IA yesterday, in order to meet up with some family. A very nice visit, and such a quaint town. I'm looking forward to Tulip time in May. This year I will take the girls to enjoy it.

Monday, January 18, 2010

Free Intuit QuickBooks download

Did I mention that I love free stuff? Maybe once or twice? Well, this freebie comes just as I was spending several hours going over our 2010 monthly budget. I am excited to try Quickbooks out. Previously I have always used Excel spreadsheets, as I am too cheap to pay for accounting software. Here's the link: http://quickbooks.intuit.com/qb/products/common/direct_download/email.jsp

After you see what it is that you are actually spending money on each month, you will be able to cut back some. Next you'll be able to stop using credit cards, pay them off AND use a cash only system. You'll love it! I'm looking forward to being back in that place. We used to be a debt free family, but unfortunately, ended up with two homes for almost a year. That threw a wrench in the cash plan. We've learned from that experience and will soon be back to that debt free life (except for our home, but that will come). Good luck!

Saturday, January 16, 2010

Chance to win a free bag from the Green Bag Lady

I love free stuff! So, thought I'd share yet another one I've come across. It's from the Green Bag Lady found at http://greenbaglady.blogspot.com/2010/01/friday-freebie-produce-bags-14-winners.html If none of us wins, we can make our own! Making bags is fun, easy, and very rewarding.

For my 3 yr old's third birthday party, she had a princess tea party theme. I stitched up hot pink fleece bags (clearance fleece from Walmart), that I lined with fabric I salvaged from curtains in a previous house. (See honey, I knew I'd use that some day. Never mind that I salvaged it 13 yrs ago.) Then before finishing the stitching, I sewed hot pink, polk-dot ribbon on for the handles (also clearance at Walmart). Here's what it looks like:


Friday, January 15, 2010

It's Friday! ---- Free Envelop Template

Hi All,

Well, it's Friday, and in my youth I LOVED this day. I was born on a Friday, perhaps a contributing factor. Who knows. Anyway, now that I'm grown up, Friday's just aren't what they used to be. It's just another day. Currently I am listening to my children, who are holed up in the bathroom, singing and saying funny things to each other as they play baby. Cute, but secretly I am just glad that they aren't standing next to me wanting every last bit of my attention.

Today is a rather dreary day as well. Although the temperatures have improved here, low 30s, the sun is shrouded by heavy clouds, making it feel quite cold again. I am looking forward to Saturday, when the temps are expected to rise to close to 40 degrees. I'd like to say that maybe I'll go running outside, but I doubt that will happen. I hate to run. However, since I am training for a triathlon, it's something I need to try and master. This morning I ran (and walked) 2 miles, but had to stop. You see, to make matters worse, I have plantar fascitis in one foot. So now, for the subsequent hours that I have been home, my foot is killing me! I just don't know how to remedy this. I've tried resting it. That works for the pain, but not for running. A shoe insert. Have one. Not so much help and it was even suggested by my doctor. So, instead, I am sitting around at the computer, looking at dishes that need to be put away and having my leg 'pretend licked' by my 6 yr old, because now she is a kitten.

Before I head off to put away the dishes, throw laundry into the dryer, and empty the water out of my 3 yr old's baby dolls (they were taking a bath), I will share a cool project with you that I found via www.econobusters.com. It's a free envelope template for, duh, making your own envelopes. I just 'ordered' mine and printed the template. Can't wait to try it out. I love crafty stuff!

http://kelleighratzlaff.com/2009/12/free-envelope-template-and-a-tutorial/

Wednesday, January 13, 2010

Good morning to myself! Oh, and anyone that might be reading. ;) Well, it is a Wednesday and it is 26 degrees (F) outside this morning at 8:30am. That might sound cold to many, but it is like a heat wave here. The expected high is 36 degrees. I can't wait! My 6 yr old is out playing in the snow with her snow pants over her pjs. Don't you love how kids can do that? Now, me, I don't like to go out in sweat pants. Shows too many fats rolls. Speaking of fat rolls, I have been doing my darnedest to get rid of them, but they seem to love me too much. This morning at my spin class workout the instructor, who once ran for 24 straight hours (for fun), is giving us a really good and painful workout. Have you ever tried to ride your bike with your upper body frozen? If not, you should try it. This same instructor is readying himself to head to Illinois in a couple of months to run 100 miles, (outdoors) once again, for fun. I admire him in a weird sort of way.

I guess that brings me to my exercising quest. I decided several months ago that I needed to get in shape. Well, I decide that everyday, but it never happens, let's be honest here. I don't want my girls to grow up fat or get the idea that they don't need to exercise. So the logical conclusion here is to enter a triathlon, right? Try not to snicker now, especially if you've met me. So last October I joined the YMCA and their triathlon class. It's been tough; but I have learned to swim pretty well, though not fast, and have definitely upped my cycling endurance. I am toying with the idea of entering my first triathlon at the end of the month. A short, indoor one. I'll keep you posted on that.

Tuesday, January 12, 2010

Photo freebies

For those of you into free stuff, here is the first of my freebies. ArtsCow.com is offering 1200 free prints. Yes, FREE! You do need to pay shipping, but still quite a deal. This is only good for new subscribers, and be sure to read all of their policies. If you're already a member, how about free shipping on an order of $30 or more? Just enter in the code freeshipping30, this expires on January 18th.

http://www.artscow.com/

How often DOES one post comments?/Homemade Yogurt & Granola

So, how often does one post comments on their blog? You know, I should really go read some blogs. I've always been lazy in the research department. Funny coming from a former scientist... I was just thinking how mesmerizing this Curious George DVD is and it made me want to get up and type something.

I was thinking I'd share my latest cooking obsession with you: Homemade Yogurt. So easy and so delicious. When I became a Mom I had grand thoughts of eating healthy and only MAKING the best for my kids. Well, that thought never really materialized. My 6 yr old's fave foods include the local Chinese buffet and Mac-n-Cheese from the box. Don't even TRY to get her to eat mac-n-cheese that I made. And I'm a good cook! But, I digress.

So, back to the yogurt. Last winter, I thought, how hard could it be? I have a bakery in my home (yet another post), yogurt should be easy; and it is! First, if you're a yogurt fan I think you'll really like this. Second, if you're not a yogurt fan, you should try this. It's not like the commercial store bought containers. So here's what you do:

Homemade Yogurt:
You will need a crockpot, milk, and some PLAIN Dannon or Stoneybrook Farms yogurt. I have made this in my large (regular size) crockpot, but I prefer the small 2 qt one. For the 2 qt crockpot, pour 4 cups of milk in. I use skim milk because that's what we drink and always have on hand, and it wouldn't be nearly as handy and easy to make if I had to run to the store. I hear that whole milk is easier for beginners, but I have never had a problem with the skim milk. If you'd like, you can add some powdered milk (you'll have to play with the amount) to your 4 cups in the crockpot and that will help thicken it if you desire. Personally, I'd wait and make a batch and see how things turned out. So now turn your crockpot on low and leave for 3 hours. After 3 hours, turn off the crockpot and let it sit for 2 hours. Next, remove 1-2 cups of warm milk and mix it with a 1/2 cup of the plain yogurt. At this point, if you'd like to try vanilla yogurt, add a tablespoon or so of vanilla. You can also add 1/2 to 1 cup of sugar, or you can make perfectly plain yogurt and just add fruit and or honey when you're ready to eat it. After whisking the milk, yogurt starter, vanilla and sugar, pour back into the crockpot and whisk all together. Turn crockpot on low again for about 30 mins. Then turn off and unplug the crockpot. Wrap it thoroughly with towels. You want to insulate it and keep as much warmth in as possible. Now let it sit on the counter for 8-12 hours. You can eat it right away, or put it in the fridge first. You will notice that quite a bit of liquid forms after being in the fridge. If you want to get fancy, you can strain this through cheesecloth. I just scoop off the excess liquid. I do it each time I take a serving out to eat. It doesn't hurt anything, it just makes it not as firm. Be sure to save about a half cup of this so you can make your next batch.

So, I am sure you noticed that this takes awhile. If you're not home during the day like me, you can speed things up by scalding the milk on the stove; let it cool, then add the yogurt starter, vanilla, and sugar. At this point you can pour into your crockpot and follow the rest of the directions. That will eliminate the first 5 hours.

To top this off, you really need to serve your yogurt with the Homemade Granola you made while you were waiting. Another super simple delicious recipe.

Easy Granola:
2 cups whole oats
1/2 cup wheat germ
2 Tbs brown sugar
1/4 cup honey
2 Tbs real maple syrup
1 Tbs water
3 Tbs oil
1/2 tsp cinnamon
1 tsp vanilla

Preheat oven to 275F. Spray a non-stick metal pan (aka cookie sheet with edges) with cooking spray.

Mix dry ingredients and set aside.

In a saucepan, simmer honey, syrup, oil, and water. Turn off heat and add the vanilla. Mix well. Pour over dry ingredients and mix well. Press into the pan. Use the bottom of a glass, sprayed with cooking spray, to press the granola down. This makes it stick better and give you larger pieces. Bake 30-45 mins, until golden brown. Let cool and then break apart and eat!

Okay, now I expect you (Holly-since I know you read the first two posts) to go try this. Enjoy!


So much to learn.

Hmmm, it is so clearly obvious that I have much to learn grasshopper... First I viewed my blog and the nice, LONG entry I wrote wasn't there. Well, Hell, I'm not going to type it again! Ah, hem, I just didn't publish it. I always save, so there it was. The formatting is funky too; and I guess I don't have to type in the date. Apparently blogger.com does that for me! Look at that. I am always learning.

My first day as a Blogger...

Tuesday, January 12, 2009


Well, I imagine that I am the only person reading this. Not only because I just created it, but, really, is there anyone that actually wants to read one more blog? I don't know. I actually don't read blogs. That doesn't seem right does it? So, I'm truly winging this, but, since my kids don't listen half the time and my husband is always on the computer, the fish don't care, and the cat can't talk, this is it.


I figure; I have a lot of things to say, so why not put them out there on the web? Maybe some day, someone will be interested. Then you and I can be Facebook friends.


I guess I should introduce myself. My name is Jena and I'm a soon to be 38 yr old Mom to two girls, 3 and 6. I live in Iowa, in the unbelievably, freakishly cold winters, and stinkin' hot summers (that makes you want to live here, doesn't it?). As mentioned previously, it is January 12th and we have already gotten our entire winter snowfall this year (not to mention, but I will, that it's been the coldest December since 1884). Now, does that mean it will not snow any more until spring? Of course not. In fact, it was snowing this morning, when I dragged myself out of the house at 5am to go swimming, but that is another story. So why do I do this? I mean, why do I live here, in the middle of Iowa? Well, I guess because, in all practicality, I stay at home with my kids, and this is where my husband works. He's an Iowa boy, though my cross country lives have swayed him. Maybe there's a move in my future sooner than I think?