Every year about this time I realize that I haven't posted anything to my fledgling blog in quite some time. Darn it. I get caught up in all the other cool stuff I'm doing. I'm a deadline person, and fortunately or not, no one lets me know when the next installment is due! I need to utilize my calendar better for this purpose. It's already covered in red, blue, and black ink with all of the things the kids and I need to take care of. :)
We've had a really weird winter here in Central Iowa. It's been incredibly mild. Secretly, well okay, maybe not so secretly, I love that! But, it worries me what is going to happen to our growing season. I'm anxious to get out into the garden. I've been drooling over all of the heirloom plant varieties that I am going to try this year. I have my starter trays ready to plant my heirloom tomatoes in and I'm already contemplating planting potatoes in this cool 'potato bag' I found recently. It unzips from the bottom, so that you can harvest potatoes as they are ready. I'm so hoping it really works!! The girls love to dig up potatoes.
Signs of spring are everywhere, even if it is only the end of February. My tulips and asiatic lilies are poking up through the ground. Last Thursday we had a couple inches of rain and then it snowed a couple. Now it's all melting. We're planning a walk today. Looking forward to that warm sun on our faces. I need to be better about posting. I have lots of fun things to share with you.

Sunday, February 26, 2012
Thursday, March 31, 2011
Roasted Beets
The other night we had roasted beets for dinner. Until recently, (like this week), I thought beets were really, and I mean, really, DISGUSTING! But, know what? They are actually really good! You see, all my life the only beets I had ever been offered (or made to eat), were pickled. Bleck! I don't like anything pickled (not even pickles), so why would I like beets pickled? Hmm, seems like a reasonable question. So, when I saw that beets would be in my produce bin this week, I decided to find a recipe that I might actually like. Since then, I've learned that other folks have discovered that beets are tasty too. So, if you are like me and have never tried beets that aren't pickled, I encourage you to try this recipe out.
SIDEBAR:
Speaking of my produce bin, if you live in my neck of the Central Iowa woods, you should check out Prudent Produce. I recently discovered them and have been so pleased to receive fresh, organic fruits and vegetables on my doorstep each Monday afternoon. The girls and I, and especially our kitten, LOVE to open the bin and see what goodies lay inside (my kitten's fave part is to actually get IN the bin--even more fun if we close the lid on him). I've made it my mission to eat EVERYTHING in that bin within the week, and to try most of the offerings. (Though when Bell Peppers are on the menu, I must reject those. That's one vegetable that I have never learned to like. )
Okay, on with the beets.... Well let's just get to the photos, shall we? I settled on roasted beets for my first try. Simple, just a few ingredients. My kind of recipe. You'll need some olive oil, salt, beets of course, a cookie sheet, and aluminum foil. (Oh, and heat the oven to 375 degrees F)

Then you'll want to wash the beets. Now I've read conflicting stories on this, but I opted to wash them, since mine were pretty muddy. (Some folks say not to wash them , as the moisture will steam the beets instead of roasting them--so I guess you decide. You will be peeling them before eating)

 As you can see, I just trimmed the bottom tap root off and the greens. Save the greens. You can cook these up like spinach. Throw the greens in a pan with some melted butter and saute with a little sea salt. I like to serve with scrambled eggs for breakfast.
Lay the prepped beets on a foil lined baking sheet and drizzle with olive oil, then sprinkle with sea salt.
 Wrap the beets up in the foil and bake for 30-60 mins. The baking time really depends on the size and how fresh your beets are. Mine took about an hour to bake, but start checking at 30 minutes. They should be tender, like a carrot or potato, when pricked with a fork.
 When they are done, remove from oven, open foil wrap, and let cool until you can handle them. On this next step gloves are optional. I chose to wear them. I didn't want purple fingers for a week (though the color is truly lovely). And, since I do have a licensed bakery here at the homestead, (I am required to wear gloves when decorating cakes), I always have a box on hand.


SIDEBAR:
Speaking of my produce bin, if you live in my neck of the Central Iowa woods, you should check out Prudent Produce. I recently discovered them and have been so pleased to receive fresh, organic fruits and vegetables on my doorstep each Monday afternoon. The girls and I, and especially our kitten, LOVE to open the bin and see what goodies lay inside (my kitten's fave part is to actually get IN the bin--even more fun if we close the lid on him). I've made it my mission to eat EVERYTHING in that bin within the week, and to try most of the offerings. (Though when Bell Peppers are on the menu, I must reject those. That's one vegetable that I have never learned to like. )
Okay, on with the beets.... Well let's just get to the photos, shall we? I settled on roasted beets for my first try. Simple, just a few ingredients. My kind of recipe. You'll need some olive oil, salt, beets of course, a cookie sheet, and aluminum foil. (Oh, and heat the oven to 375 degrees F)

Then you'll want to wash the beets. Now I've read conflicting stories on this, but I opted to wash them, since mine were pretty muddy. (Some folks say not to wash them , as the moisture will steam the beets instead of roasting them--so I guess you decide. You will be peeling them before eating)


Lay the prepped beets on a foil lined baking sheet and drizzle with olive oil, then sprinkle with sea salt.


When the beets are cool enough to handle, peel off the outer skin. This will come off super easy. Then just slice, sprinkle with sea salt, and serve. Roasted beets taste like a wonderful, earthy combination of potatoes and carrots. I think you'll really like them!

Tuesday, March 29, 2011
Dairy Free Sugar Cookies
I thought I would share my yummy, dairy-free sugar cookie recipe with you all. You can even make this vegan if you'd like to use an egg substitute. The icing is also non-dairy and dye free as well. It may be hard to tell from this photo, but the icing is actually pink.

I think the key to these cookies is to not cook them too long. If you do, they become very hard and brittle. I prefer chewy cookies.
Non-dairy Sugar Cookies
2/3 cup coconut oil (warm this so it is melty, but it doesn't have to be liquid)
2 cups all-purpose flour
1 egg
3/4 cup white sugar
1 Tbs coconut milk (or any non-dairy milk drink)
1 tsp baking powder (preferably a non-Aluminum variety)
2 tsp vanilla (use a good quality, non-irradiated type like Penzey's)
dash sea salt
Beat the coconut oil and sugar until blended. Add egg and vanilla. Mix well. Add salt and baking powder; mix then add one cup of flour; and mix well. Add milk and second cup of flour. Mix again.
Roll out dough (divide into about 3 portions for easier rolling) on floured surface, sprinkling more flour on to dough as needed to keep it from sticking. Using a cookie cutter, cut out desired shapes. You'll want the dough to be relatively thick. Thin cookies will bake too quickly and become brittle (we don't that!).
Place cookies on a baking sheet and then into a preheated 375 degree farenheit oven. Bake about 11 minutes, but you'll likely need to test this out with your own oven. I try not to brown the cookies like most recipes say, because at this point they are going to be brittle (again, we don't want this...)
When they are done, let them cool about 5 minutes and then remove them and place them on a cooling rack. If you take a cookie at this point and break it open, you should see a lot of layers. Much like GOOD pie crust. You want your cookies to be flaky.
Now, when they are cool, you can ice them. I whip up a simple mixture of non-dairy butter (or you can use coconut oil, but the butter has a less intrusive flavor--let's say 2-3 Tbs), a dash of vanilla (let's say about 1 tsp), powdered sugar (let's say about 2 cups), and coconut milk to bring it all together. If you want to make them pink, use strawberry jam; in which case you may need less milk, so add that last. I had made a strawberry pancake syrup, so I poured that in. Mmm, it was delicious!
If you don't have a problem with dairy and you're not vegan, you can certainly use butter and regular milk in the recipe. It works great as well. Here's a couple of photos of cookies I've made in the past. (The icing does have artificial dyes in these photos.)
These tiger cookies were made to go with matching cupcakes for a child's birthday party.
 A gift for a teacher.
 Aren't this flip-flop cookies cute? I made these for a bridal shower. Very fun!
 Valentine cookies.


I think the key to these cookies is to not cook them too long. If you do, they become very hard and brittle. I prefer chewy cookies.
Non-dairy Sugar Cookies
2/3 cup coconut oil (warm this so it is melty, but it doesn't have to be liquid)
2 cups all-purpose flour
1 egg
3/4 cup white sugar
1 Tbs coconut milk (or any non-dairy milk drink)
1 tsp baking powder (preferably a non-Aluminum variety)
2 tsp vanilla (use a good quality, non-irradiated type like Penzey's)
dash sea salt
Beat the coconut oil and sugar until blended. Add egg and vanilla. Mix well. Add salt and baking powder; mix then add one cup of flour; and mix well. Add milk and second cup of flour. Mix again.
Roll out dough (divide into about 3 portions for easier rolling) on floured surface, sprinkling more flour on to dough as needed to keep it from sticking. Using a cookie cutter, cut out desired shapes. You'll want the dough to be relatively thick. Thin cookies will bake too quickly and become brittle (we don't that!).
Place cookies on a baking sheet and then into a preheated 375 degree farenheit oven. Bake about 11 minutes, but you'll likely need to test this out with your own oven. I try not to brown the cookies like most recipes say, because at this point they are going to be brittle (again, we don't want this...)
When they are done, let them cool about 5 minutes and then remove them and place them on a cooling rack. If you take a cookie at this point and break it open, you should see a lot of layers. Much like GOOD pie crust. You want your cookies to be flaky.
Now, when they are cool, you can ice them. I whip up a simple mixture of non-dairy butter (or you can use coconut oil, but the butter has a less intrusive flavor--let's say 2-3 Tbs), a dash of vanilla (let's say about 1 tsp), powdered sugar (let's say about 2 cups), and coconut milk to bring it all together. If you want to make them pink, use strawberry jam; in which case you may need less milk, so add that last. I had made a strawberry pancake syrup, so I poured that in. Mmm, it was delicious!
If you don't have a problem with dairy and you're not vegan, you can certainly use butter and regular milk in the recipe. It works great as well. Here's a couple of photos of cookies I've made in the past. (The icing does have artificial dyes in these photos.)
These tiger cookies were made to go with matching cupcakes for a child's birthday party.


Saturday, March 26, 2011
Felt Flower Garland
Right after Thanksgiving I decided to make a Holiday garland for my fireplace mantel. Instead of the usual red and green Christmas choices, I decided on blues, since that's my favorite and would go best with my decor. I saw a photo of these in a magazine. Hmm, it must have been either Country Living or Better Homes & Gardens (I'm sure it was one of those). Anyway, it looked simple enough, so I happily took the girls over to Michael's and picked out several shades of blue. I cut out each color in several different sizes. In order to make these flowers, you need two colors per flower; 5 large ovals (all same color) and 5 smaller ovals (also all same color), but of course, the large and small ovals should not be the same color. Here's a look at the ovals:

You really only need, maybe, three pieces of felt in each color, because you can cut a lot of ovals from each piece; and you can control the size you make them. We even made some tiny ones from the scraps. Once these were cut out, it was just a matter of layering the two different sizes and running a few stitches back and forth over the bottom to form a petal.


 Once you have the first one done, just continue on with the next four. When all five are sewn together, you just need to connect the first and fifth together. This can be a little tricky, because you want to be sure to make the flower point downward, and to have the petals lay evenly.

Here's the first completed flower. Now to make a bunch more and string them together!

 Here's a close up of the finished product. It even matched PERFECTLY to the candles a friend made for me!
  So, now you have plenty of time to run down to the craft store and pick up felt in your favorite spring time or Easter colors and make a garland to enjoy!

You really only need, maybe, three pieces of felt in each color, because you can cut a lot of ovals from each piece; and you can control the size you make them. We even made some tiny ones from the scraps. Once these were cut out, it was just a matter of layering the two different sizes and running a few stitches back and forth over the bottom to form a petal.


Here's the first completed flower. Now to make a bunch more and string them together!


Friday, March 25, 2011
Bubblegum Birthday Party
It's been way too long since I posted anything, so it's time. :) In one of my last posts, I showed you how we made a Princess Tea Party Birthday for my daughter's then 3rd birthday. A few months ago she turned 4 and decided on a Bubblegum party. Now, in our house, our girls are not allowed to chew gum until they turn 4, so pretty much since the day she turned 3 she has been planning her bubblegum party!
Of course I had an entire year to plan this, but alas, I only really started about 6 weeks prior; and then it was mostly stressing that I wouldn't have time to do what I wanted. I finally settled on bubblegum machines for the party guests. I had thought I'd just head on over to the local Dollar store and pick up a machine for each child, since I had seen these over the prior Christmas, but they did not have any! Now what?! Well, I decided I'd better figure out how to make them instead. So, here is what I came up with.

Aren't they cute? They turned out to be pretty simple. Even the girls helped. You will need:
A small (about 4") terracotta pot and corresponding saucer. (about $1.25 for the pair)
Glass bowl/globe (I found mine at Michael's because I needed seven, but I tried the second hand stores first. They did have them, just not seven matching, which I wanted) ($1 each--same as second hand stores)
Wooden ball/knob ($1.50 for a package of 8)
Paint (scrounged in my basement for some lovely pink)
Ribbon (found 9 yds for $.069 at the Goodwill)
Paint pens (not necessary, but much easier) ($5-10 depending on the package size, coupon)
Kid craft paints (also not necessary, but I had them on hand)
Hot glue gun
We started by painting all of the pottery parts pink. I covered the kitchen island with paper, got out the paint smocks, and let the girls paint their bubblegum machines. While the paint was drying, I painted the wooden balls, each a different color. For this, I used the kids craft paints. Next was to hot glue my ribbon around the base of the bubblegum machine (which technically is the top of the pot, but it's flipped upside down). After I finished that, and still had the glue gun hot, I glued the glass globe onto the machine base, and then finally I glued the wooden 'gum ball' to bottom of the saucer, which is the lid to the machine.


All that is left is to fill them, which the birthday girl got to do. All of our guests were allowed to chew gum, except for one. I, unbelievably, was able to find jelly beans that looked EXACTLY like the gum balls! Sometimes I just amaze myself. Ha, ha!
The next fun thing was to collect items for the goody bags. Last year I made each child their own fuzzy bag/purse. This year I found a package of hot pink, fabric bags at Michael's for $1 for a package of 3. I just embellished each a bit with ribbon and their initial and there we go!


I hit the dollar spot at Target and the local Dollar store. There we scored wands, lip sticks, and of course lots of bubblegum! We also made bubblegum necklaces with shrinky dinks. Cute, but next time I'll make a larger hole for the string and use thicker string to avoid the tangles.

Party favors are covered. I even sewed little 'bubblegum' pillows for decorations. I hung these from the ceiling and passed them out as the guests left. It turned out well. Here's a peek at the pillows.
 And below the pillow is a view of the whole set up. Complete with kitten attacking the balloon strings. :)
 And, last, but not least, the cake! Couldn't resist a copy of the bubblegum machines, but in order to keep my stress to a minimum, I just drew it on the cake and did not carve a bubblegum machine out of cake.


Of course I had an entire year to plan this, but alas, I only really started about 6 weeks prior; and then it was mostly stressing that I wouldn't have time to do what I wanted. I finally settled on bubblegum machines for the party guests. I had thought I'd just head on over to the local Dollar store and pick up a machine for each child, since I had seen these over the prior Christmas, but they did not have any! Now what?! Well, I decided I'd better figure out how to make them instead. So, here is what I came up with.

Aren't they cute? They turned out to be pretty simple. Even the girls helped. You will need:
A small (about 4") terracotta pot and corresponding saucer. (about $1.25 for the pair)
Glass bowl/globe (I found mine at Michael's because I needed seven, but I tried the second hand stores first. They did have them, just not seven matching, which I wanted) ($1 each--same as second hand stores)
Wooden ball/knob ($1.50 for a package of 8)
Paint (scrounged in my basement for some lovely pink)
Ribbon (found 9 yds for $.069 at the Goodwill)
Paint pens (not necessary, but much easier) ($5-10 depending on the package size, coupon)
Kid craft paints (also not necessary, but I had them on hand)
Hot glue gun
We started by painting all of the pottery parts pink. I covered the kitchen island with paper, got out the paint smocks, and let the girls paint their bubblegum machines. While the paint was drying, I painted the wooden balls, each a different color. For this, I used the kids craft paints. Next was to hot glue my ribbon around the base of the bubblegum machine (which technically is the top of the pot, but it's flipped upside down). After I finished that, and still had the glue gun hot, I glued the glass globe onto the machine base, and then finally I glued the wooden 'gum ball' to bottom of the saucer, which is the lid to the machine.


All that is left is to fill them, which the birthday girl got to do. All of our guests were allowed to chew gum, except for one. I, unbelievably, was able to find jelly beans that looked EXACTLY like the gum balls! Sometimes I just amaze myself. Ha, ha!
The next fun thing was to collect items for the goody bags. Last year I made each child their own fuzzy bag/purse. This year I found a package of hot pink, fabric bags at Michael's for $1 for a package of 3. I just embellished each a bit with ribbon and their initial and there we go!


I hit the dollar spot at Target and the local Dollar store. There we scored wands, lip sticks, and of course lots of bubblegum! We also made bubblegum necklaces with shrinky dinks. Cute, but next time I'll make a larger hole for the string and use thicker string to avoid the tangles.

Party favors are covered. I even sewed little 'bubblegum' pillows for decorations. I hung these from the ceiling and passed them out as the guests left. It turned out well. Here's a peek at the pillows.


There you have it. Another successful birthday party down. Hope you enjoyed the show too.
PS. I forgot to show off our cute invitation. Here's a photo:

Friday, December 10, 2010
Cute Onesie Tutu
I mentioned back in October that I had made a cute onesie tutu for a friend's baby. Thought I'd actually show you a picture. (It's only December, I'm not that late, right?) Here are the materials. Nothing fancy. Cute onesie. Some ribbon and tulle (and pink thread, not shown).
 It was a quick sewing job. My tulle was very short (perfect for a onesie), so I didn't need to trim it at all, just fold it in half. I positioned the tulle so that it would not touch the baby's legs and bother her. I then sewed the folded tulle on; wrapping it twice, so that it is four layers. With that complete, I sewed the ribbon over the top of the tulle; and voila! Done.
 Of course, before giving our gift, we had to try it on (so insisted my 3 year old). So, who better to model than her pink Sea Otter?
 I know. Too cute.


Princess Tea Party
In honor of my just-turned four year old's birthday, I thought I'd share last year's birthday party. For her third birthday it was all about being big enough to have a real tea set and pretty, fancy things. In order to accomplish this, but not break the budget, we had to get creative. Something I love to do! First, I hit the second hand stores and scored a cup and saucer (matching no less) for each child at a cost of 98 cents a child. (We had 5 children, including the birthday girl and her sister--We keep it small around here)
 After getting the cups home, I washed them, and grabbed the acrylic craft paint and proceeded to paint each child's name on one cup. Party favor one.
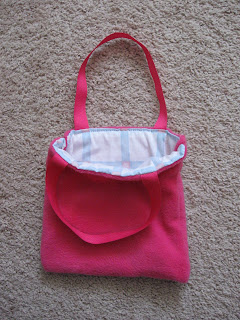
Next line of business was to sew cute gift bags that double as a dress up purse. For this, I made a trip to Walmart's sewing section and scored some hot pink, fuzzy fleece and pink polka dot ribbon (all on clearance/remnants). These were very simple bags that I lined with some fabric that I 'inherited' from old curtains in a former house. See, I knew I'd use it one day. ;)

Party favor two. Check. Oh, and to fill these bags, I managed to find a necklace, bracelet and ring candy kit at my local dollar store, plus a few lollipops I had in my stash and some dollar store trinkets. All in all, the bags (materials and filling) cost about $3 per child. So we're up to up $4 a child.
Next step was to decorate for the party. This involved streamers and pink tulle. The latter that I bought off of ebay for a steal! I also needed the cheapest pink bouquet of flowers (with at least 5 sprigs each) and balloons. For the balloons, I again shopped the local dollar store and got four white heart balloons and four pink heart balloons, and two 'special' balloons. Mylar. One dollar each. Also found lovely pink mums for $5 a bunch. Plenty for all. Here's how things were looking.


For the cake, my princess had a Cinderella cake. I purchased a Cinderella water Barbie doll and then baked a cake in one of my mixing bowls. I then inserted the Barbie (after wrapping her in plastic wrap) in the cake and decorated.

The plate is something I made another time. It's the "Birthday Plate" in our house.
When it was time for our guests to leave they took home a cute, fuzzy bag with goodies, a balloon, foam picture frame that they made while here, a personalized tea cup, and a mini bouquet of flowers. So, for our cost tally, we have the $3 bags, $1 tea cup, $1 balloon, $1 flower bouquet and about 50 cents for the foam craft. So, we spent less than $7 a child for a whole lot of cool stuff. That is $35 plus another $5 for the other balloons that the birthday girl kept; about $5 for the tulle and streamers. I made the cake, so only a couple of dollars in materials there, plus the Barbie, which doubled as a gift (about $10).
Birthday total: $45 Let's call it $50, since I may have forgotten something. So, there you have it. A fun and really cute Princess Birthday party for my then 3 year old. A good investment for the money. At this age I would rather pay this, than rent a facility to play at for $100-$200 PLUS have to have goodie bags, cake, etc.

Next line of business was to sew cute gift bags that double as a dress up purse. For this, I made a trip to Walmart's sewing section and scored some hot pink, fuzzy fleece and pink polka dot ribbon (all on clearance/remnants). These were very simple bags that I lined with some fabric that I 'inherited' from old curtains in a former house. See, I knew I'd use it one day. ;)


Party favor two. Check. Oh, and to fill these bags, I managed to find a necklace, bracelet and ring candy kit at my local dollar store, plus a few lollipops I had in my stash and some dollar store trinkets. All in all, the bags (materials and filling) cost about $3 per child. So we're up to up $4 a child.
Next step was to decorate for the party. This involved streamers and pink tulle. The latter that I bought off of ebay for a steal! I also needed the cheapest pink bouquet of flowers (with at least 5 sprigs each) and balloons. For the balloons, I again shopped the local dollar store and got four white heart balloons and four pink heart balloons, and two 'special' balloons. Mylar. One dollar each. Also found lovely pink mums for $5 a bunch. Plenty for all. Here's how things were looking.


For the cake, my princess had a Cinderella cake. I purchased a Cinderella water Barbie doll and then baked a cake in one of my mixing bowls. I then inserted the Barbie (after wrapping her in plastic wrap) in the cake and decorated.

The plate is something I made another time. It's the "Birthday Plate" in our house.
When it was time for our guests to leave they took home a cute, fuzzy bag with goodies, a balloon, foam picture frame that they made while here, a personalized tea cup, and a mini bouquet of flowers. So, for our cost tally, we have the $3 bags, $1 tea cup, $1 balloon, $1 flower bouquet and about 50 cents for the foam craft. So, we spent less than $7 a child for a whole lot of cool stuff. That is $35 plus another $5 for the other balloons that the birthday girl kept; about $5 for the tulle and streamers. I made the cake, so only a couple of dollars in materials there, plus the Barbie, which doubled as a gift (about $10).
Birthday total: $45 Let's call it $50, since I may have forgotten something. So, there you have it. A fun and really cute Princess Birthday party for my then 3 year old. A good investment for the money. At this age I would rather pay this, than rent a facility to play at for $100-$200 PLUS have to have goodie bags, cake, etc.
Subscribe to:
Posts (Atom)